
How to Fix Ride On Car Battery: 7 Steps
Table of Contents
- Diagnose Why Your Ride-On Car Battery Won't Work
- Check Battery Charge and Condition
- Ride-On Car Battery Not Charging: Charger and Port Diagnosis
- Inspect Battery Wires, Connectors, and Electrical Connections
- How to Change a Ride-On Car Battery: Step-by-Step Replacement
- Match Replacement Battery Voltage and Specifications
- Ride-On Car Battery Troubleshooting: Slow Speed and Short Run Time
- Common Mistakes to Avoid When Fixing Your Ride-On Car Battery
- Frequently Asked Questions
Last Updated: October 16, 2026
Diagnose Why Your Ride-On Car Battery Won't Work
A ride-on car battery that won't start or has no power is frustrating, but the fix is often simpler than you think. Most problems fall into just a few categories. Before you assume the battery is dead, run through this diagnostic process to pinpoint the real culprit.
Check for Power and Symptoms
Start by observing what actually happens when your child tries to drive. Does the car make any sound at all? Are the lights responding? Does the motor turn over slowly, or is there complete silence?
These clues tell you where the problem lives:
- Complete silence, no lights, no sounds = Power isn't reaching the car at all
- Lights work, but motor won't turn = Power is present, but the motor circuit has an issue
- Everything works but the car moves slowly = Battery charge is low or the battery is aging
- Car starts then stops after seconds = Battery connection is loose or battery is failing
Write down exactly what you observe. This becomes your diagnostic anchor.
Create a Diagnostic Flowchart
Before you start disconnecting wires, follow this decision tree:
Step 1: Does the car have ANY power (lights, sounds, or motor response)?
- If YES → Go to "Check Battery Charge and Condition"
- If NO → Go to "Inspect Battery Wires, Connectors, and Electrical Connections"
Step 2: If power exists but the motor won't turn, check the mode switch. Many ride-on cars have a manual/remote toggle. Flip it to the opposite setting and try again.
Step 3: If the car runs but dies quickly, the battery is likely discharged or aging. Proceed to charging and capacity testing.
This flowchart saves time by eliminating impossible scenarios.
Check Battery Charge and Condition
Your ride on car battery is rechargeable, but it needs proper care to hold a charge. A 12V battery that's fully charged should deliver steady power for 40-90 minutes, depending on the model.
Visual Inspection
Before plugging anything in, look at the battery itself. Open the battery compartment and examine the physical condition.
Check for these red flags:
- Cracks, leaks, or swelling = Battery is damaged and must be replaced
- Corrosion on terminals (white, blue, or green crusty buildup) = Clean it off with a dry cloth or fine-grit sandpaper
- Loose battery straps or mounting = Tighten the straps so the battery sits firmly in place
- Disconnected wires = You've found your problem; reconnect them (see the wiring section below)
A battery that looks intact and is firmly mounted is ready for the next test.
Testing Battery Voltage with a Multimeter
A multimeter is the only tool that tells you the battery's true charge level. You can buy one for under $15, and it's essential for this diagnosis.
Set your multimeter to DC voltage (marked with a V and a straight line). Touch the red probe to the positive terminal (marked + or red) and the black probe to the negative terminal (marked - or black).
A healthy 12V battery reads between 12.6 and 13.0 volts when fully charged. Here's what different readings mean:
- 12.6V or higher = Battery is charged; the problem is elsewhere
- 11.0-12.5V = Battery has some charge but is low; try charging it fully
- Below 11.0V = Battery is deeply discharged or failing and likely needs replacement
- 0V or no reading = Battery is dead or disconnected
If your battery reads above 12.6V but the car still won't move, the issue is in the motor, switch, or wiring, not the battery itself.
Ride-On Car Battery Not Charging: Charger and Port Diagnosis
If your battery is reading low on the multimeter, the charger or charging port might be the culprit, not the battery.
Inspect the Charging Port
The charging port is where the charger plug connects. Look for damage or loose connections.
Check these points:
- Inspect the port for bent pins or corrosion = Gently straighten bent pins with a small tool, or clean corrosion with a dry cloth
- Wiggle the charger plug in the port = It should fit snugly with no rocking motion
- Look for cracks around the port housing = A cracked port may need professional repair or battery replacement
- Ensure the port isn't clogged with dirt or debris = Clean it gently with a dry cloth or soft brush
A loose connection stops charging even if the charger works perfectly.
Test the Charger
Plug the charger into a wall outlet and look for indicator lights. Most chargers show a light when plugged in (usually red or green).
If there's no light, the charger itself is dead. Try a different outlet to rule out a tripped circuit breaker. If the charger still doesn't light up, it needs replacement.
If the charger lights up but the battery isn't charging after 4-6 hours, the issue is likely the battery connection or the battery itself.
Inspect Battery Wires, Connectors, and Electrical Connections
The wires connecting the battery to the motor and switches are the nervous system of your ride-on car. A single loose wire stops everything.
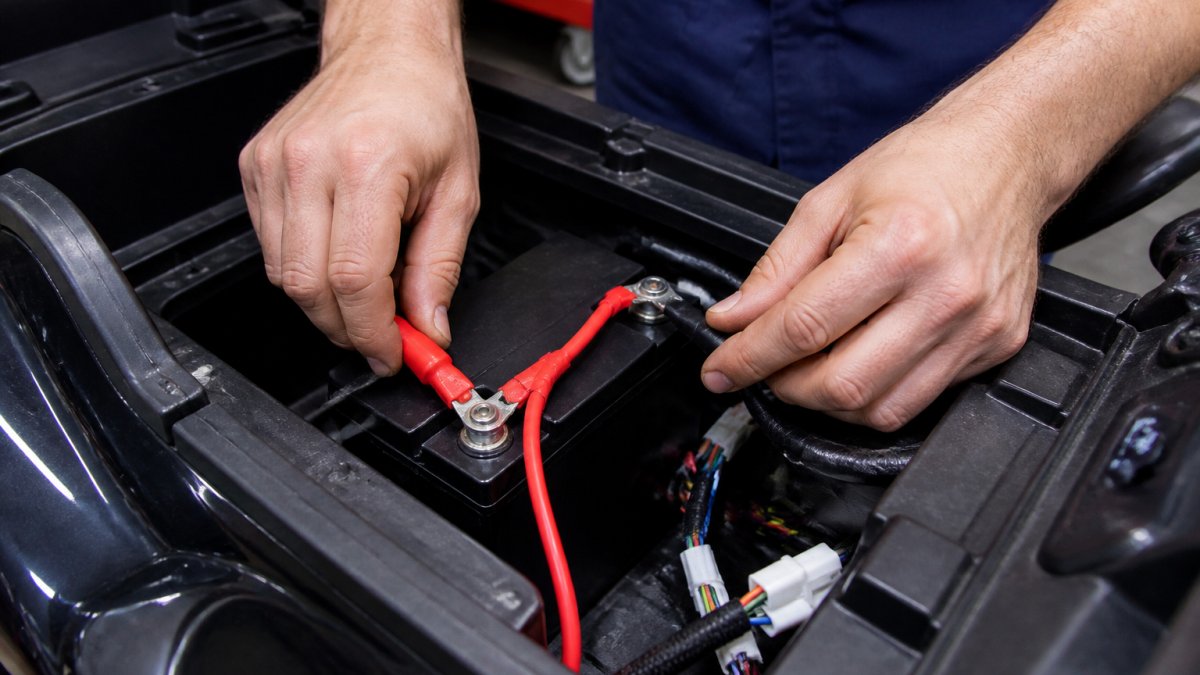
Check Wiring and Battery Leads
Your battery has two wires: a red wire (positive) and a black wire (negative). These wires carry power to the motor and switch. Trace them from the battery terminals to where they connect to the rest of the car.
Look for these problems:
- Wires pulled loose from terminals = The connection broke during use or assembly
- Wires cut, pinched, or melted = The wire insulation is damaged and must be replaced
- Wires disconnected inside the car = Vibration during play can shake connectors loose
- Corroded or dirty connectors = Buildup prevents good electrical contact
Reseat Loose Connections
If a wire has pulled loose from its terminal, push it back on firmly. The connector should sit snugly on the battery post.
For corroded connections, unplug the wire and clean both the wire connector and the battery terminal with a dry cloth or fine-grit sandpaper. Remove any white, blue, or green buildup. Reconnect the wire and ensure it's tight.
Test the car after reseating. Many no-power problems are solved by this single step.
How to Change a Ride-On Car Battery: Step-by-Step Replacement
If your battery tests below 11V on the multimeter, won't charge after 6+ hours, or shows physical damage, it's time to replace it. A new 12V battery restores full power and run time.
What You'll Need
Gather these items before starting:
- A replacement 12V 4.5Ah rechargeable battery (the same voltage and amp-hour rating as your original)
- A screwdriver (Phillips or flathead, depending on your car model)
- A wrench or socket set (to remove battery terminal bolts, if present)
- A dry cloth or fine-grit sandpaper (to clean corrosion)
- Safety glasses (optional but recommended)
Replacement Steps
Step 2: Open the battery compartment. Most ride-on cars have a panel or hatch that opens with screws.
Step 5: Remove the battery straps or clips. Most batteries are held in place by plastic or metal straps.
Step 8: Reconnect the negative (black) wire. Attach the black wire to the negative terminal and tighten.
Step 9: Secure the battery with straps or clips. The battery must not move during play.
Step 10: Close the battery compartment and screw the panel back in place.
Test the car after charging.
Match Replacement Battery Voltage and Specifications
Not all 12V batteries are the same. Buying the wrong replacement wastes money and can damage your car's motor.
Understanding 12V Battery Chemistry and Compatibility
Your ride-on car runs on a 12V rechargeable lead-acid or lithium battery.
Beyond voltage, the amp-hour (Ah) rating matters. Most ride-on cars use a 4.5Ah battery, which delivers 40-90 minutes of play time. A smaller 3Ah battery runs shorter.
Always match the original battery's voltage and Ah rating. Check your car's manual or the battery compartment label for the exact specifications. When you order a replacement, confirm the voltage and amp-hour rating before checkout.
Using the correct battery ensures your car runs safely at the speed and duration your child expects.
Ride-On Car Battery Troubleshooting: Slow Speed and Short Run Time
A battery that charges but delivers weak power or dies quickly is aging. This is normal wear, not a defect.
Why Your Ride-On Car Loses Power Quickly
Rechargeable batteries degrade over time. After 100-200 charge cycles (roughly 1-2 years of regular use), a battery holds less charge and delivers weaker power. Your child might notice the car running at half speed or stopping after 20-30 minutes instead of the usual 60-90 minutes.
This is not a safety issue, but it signals that the battery is approaching the end of its useful life. You have two options: replace the battery now, or accept shorter play sessions until the battery is completely dead.
Battery Care and Storage for Longer Lifespan
You can extend your battery's life by following these practices:
- Charge after every play session. Don't let the battery sit discharged for days or weeks
- Store the car indoors during winter. Cold temperatures reduce battery performance and lifespan
- Avoid overcharging. Unplug the charger after 6-8 hours; leaving it plugged in overnight degrades the battery
- Keep the battery dry. Don't leave the car outside in rain; water inside the battery compartment causes corrosion and shorts
- Use the correct charger. A charger designed for a different voltage can damage the battery
Most ride-on car batteries last 1-2 years with proper care. When yours starts losing power, a replacement battery is inexpensive and brings the car back to life.

Common Mistakes to Avoid When Fixing Your Ride-On Car Battery
Learning from others' mistakes saves time and prevents damage.
Mistake 2: Connecting the wires in the wrong order. Always disconnect negative first and reconnect positive first.
Mistake 3: Using the wrong replacement battery. A 6V or 18V battery will damage your car.
Mistake 4: Leaving the charger plugged in indefinitely. Overcharging shortens battery life. Unplug after 6-8 hours.
Mistake 5: Ignoring corrosion on the terminals. White, blue, or green buildup blocks electrical current.
Mistake 7: Charging a wet or damaged battery. If the battery got wet or shows cracks, don't charge it. Replace it instead.
Battery problems are fixable, and most solutions take under an hour. If you've tested the voltage, checked the wires, and cleaned the connections and the car still won't run, the battery itself is likely damaged and needs replacement. VroomVroomToy ride-on cars use standard 12V batteries that are easy to find and swap out.

Frequently Asked Questions
How do I know if my ride-on car battery is dead or if the charger is broken?
Test the battery voltage with a multimeter. A healthy 12V battery should read 12 to 13 volts when fully charged. If it reads below 10 volts or zero, the battery is likely dead. If the battery voltage is correct but won't charge after 8 hours of charging, the charger or charging port is faulty. Inspect the charging port for corrosion or loose connections first before replacing the charger.
How long does it take to charge a ride-on car battery?
Most 12V ride-on car batteries take 8 to 12 hours to charge fully. Never leave a battery charging longer than 24 hours, as overcharging can damage the cells and reduce lifespan. Check your vehicle's manual for the exact charging time, as some models like the VroomVroomToy MC offer 40 to 60 minutes of run time per full charge.
Can I repair a ride-on car battery at home, or is it unsafe?
Basic troubleshooting and battery replacement are safe if you follow proper precautions: unplug the charger before working, wear safety glasses, never touch the positive and negative terminals together, and avoid opening sealed batteries. However, if the battery is swollen, leaking, or damaged, stop immediately and replace it. Always dispose of old batteries at an approved recycling facility, not in regular trash.
What replacement battery specifications should I match for my ride-on car?
Match the voltage (usually 12V), amp-hour rating (typically 4.5Ah to 10Ah), and connector type of your original battery. Check your vehicle's manual or the battery label for the exact specifications. Using a battery with higher voltage or different connectors can damage the motor and electrical system. When in doubt, contact USA-based customer support to confirm the correct replacement battery for your model.


